How to Build a Task Manager Application Using React, Airtable and GraphQL
Jesus Manuel Olivas
June 01, 2021
After spending most of my days doing Product Management work lately, I decided to spend some time building a PoC application to manage daily tasks for my kids.
The Idea
The goal was to build it using ReactJS and write as little code as possible. Yes, the plan relied on taking advantage of tools & libraries to reduce the needed code for this first iteration.
The Data Storage
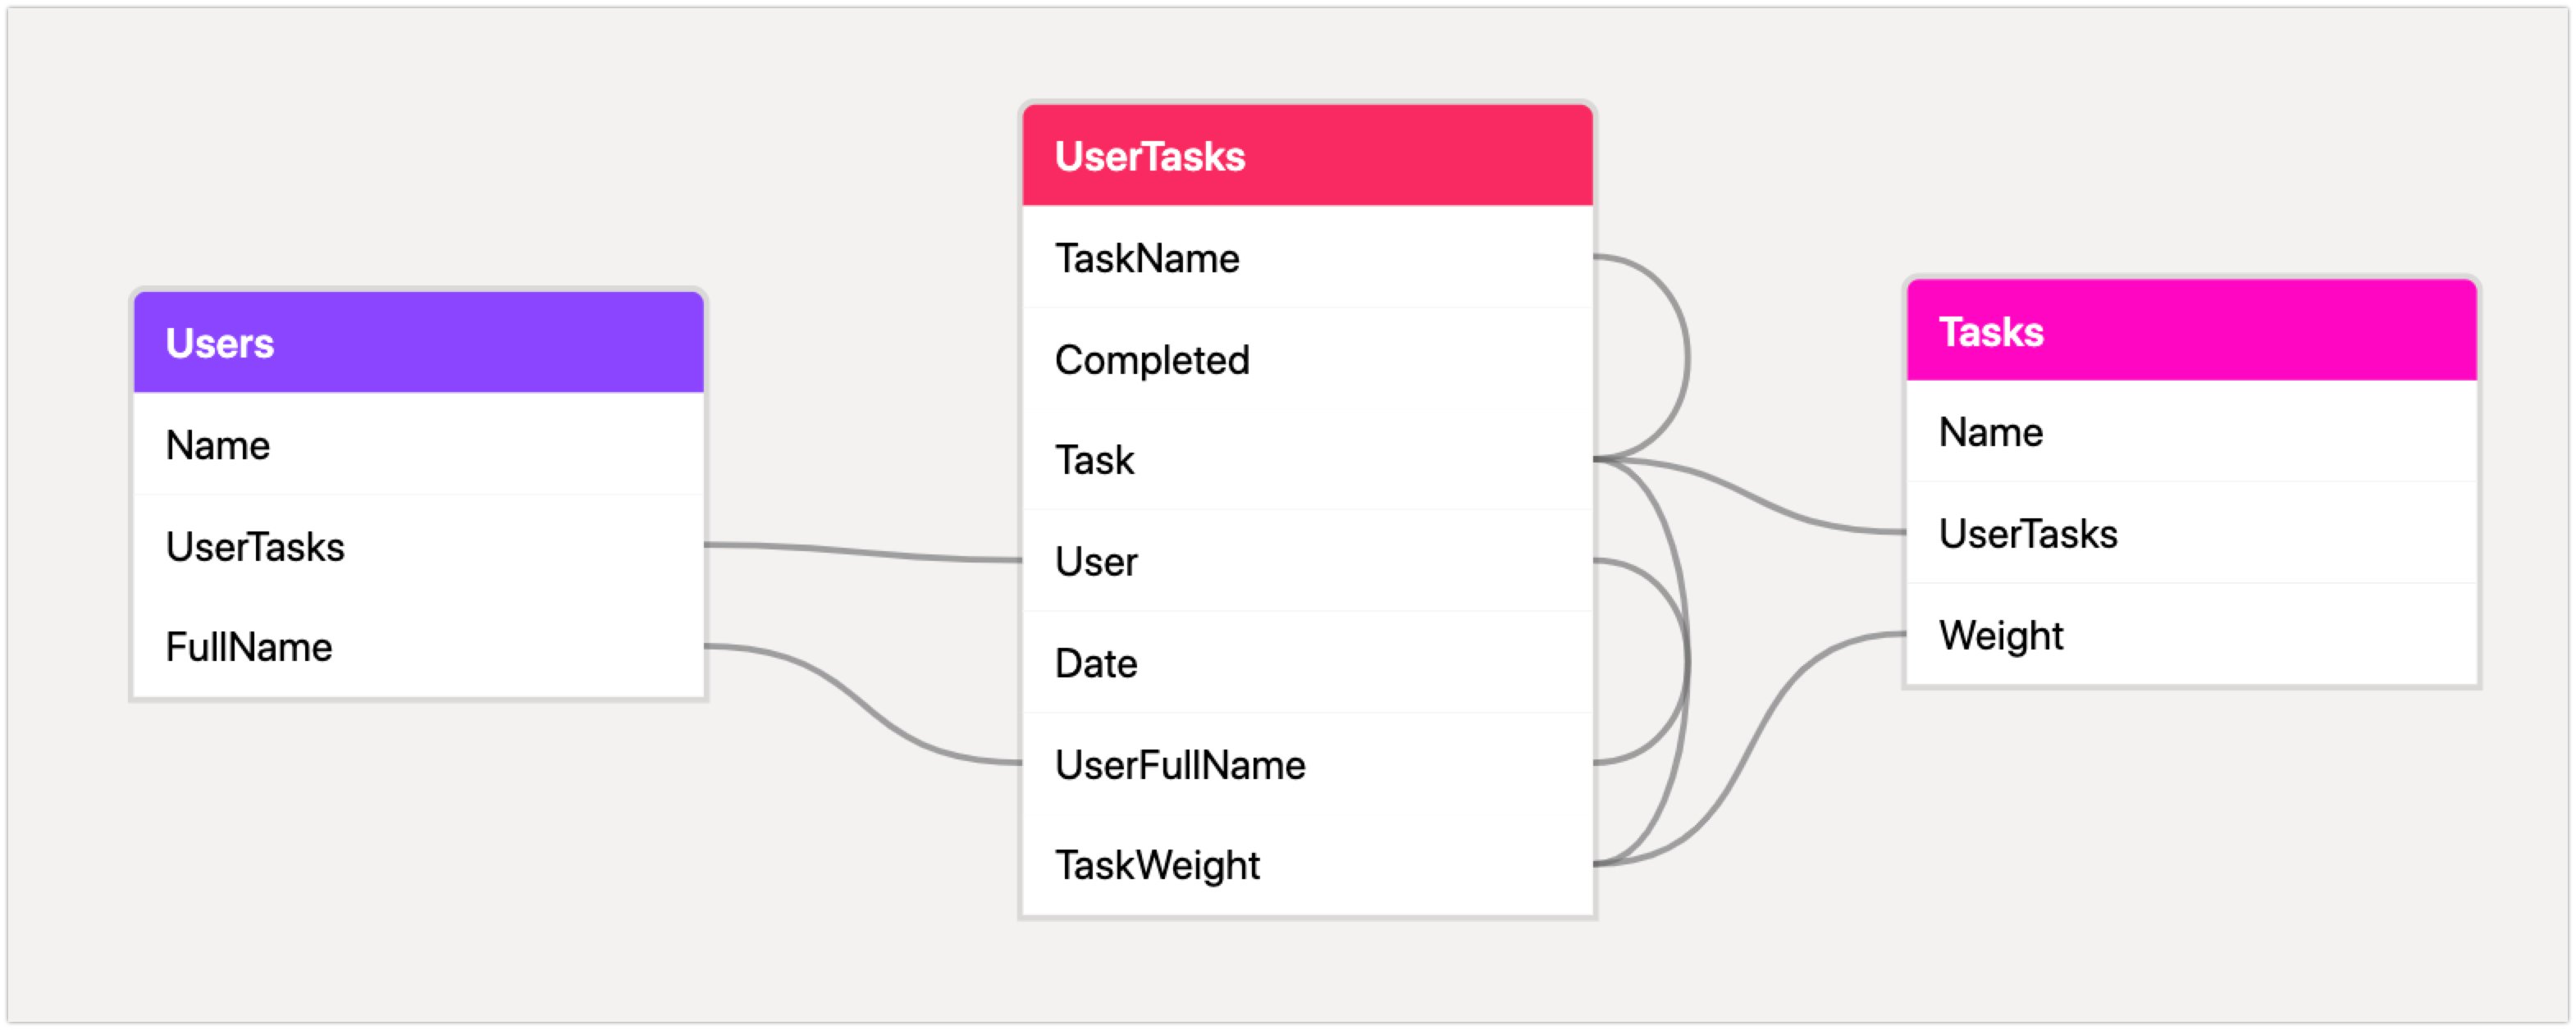
Airtable was chosen for the data storage to avoid creating and maintaining a DB schema and/or GraphQL DSL, also to avoid creating a GUI to manage (review/filter/group) the tasks.
The app was simple enough to only require the creation of three tables, Users, Tasks and UserTasks.
Since GraphQL was prefered as endpoint to expose the Airtable data. The decision to use BaseQL was made to take care of this duty without writing any line of code.
While exposing the GraphQL API via BaseQL a few limitations got discovered. The main issue was related to sorting data using nested elements userTasks->task->weight and the implemented work-around was creating a new Lookup field on the UserTask <-> Task linked record to provide a new field available as userTasks->taskWeight not pretty, but it works as expected.
This is how the Lookup field configuration looks like:
Probably spending more time reading the BaseQL docs is required to resolve this without adding the Lookup field.
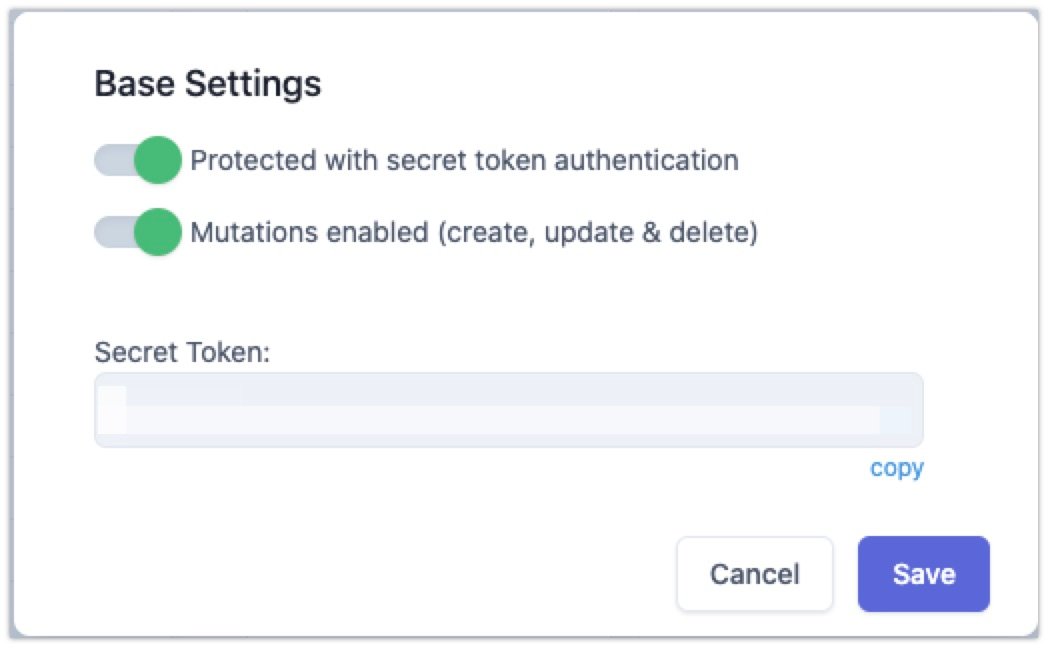
BaseQL provide a really intersting feature which allows you to expose mutations on your GraphQL API by updating a configuration option via the application interface as show here:
For the Table/Grid UI interface, the decision to use TableQL created by @danilo_zekovic was made because of the out-of-the-box and easy to use features.
This is the required code to render a table using this library:
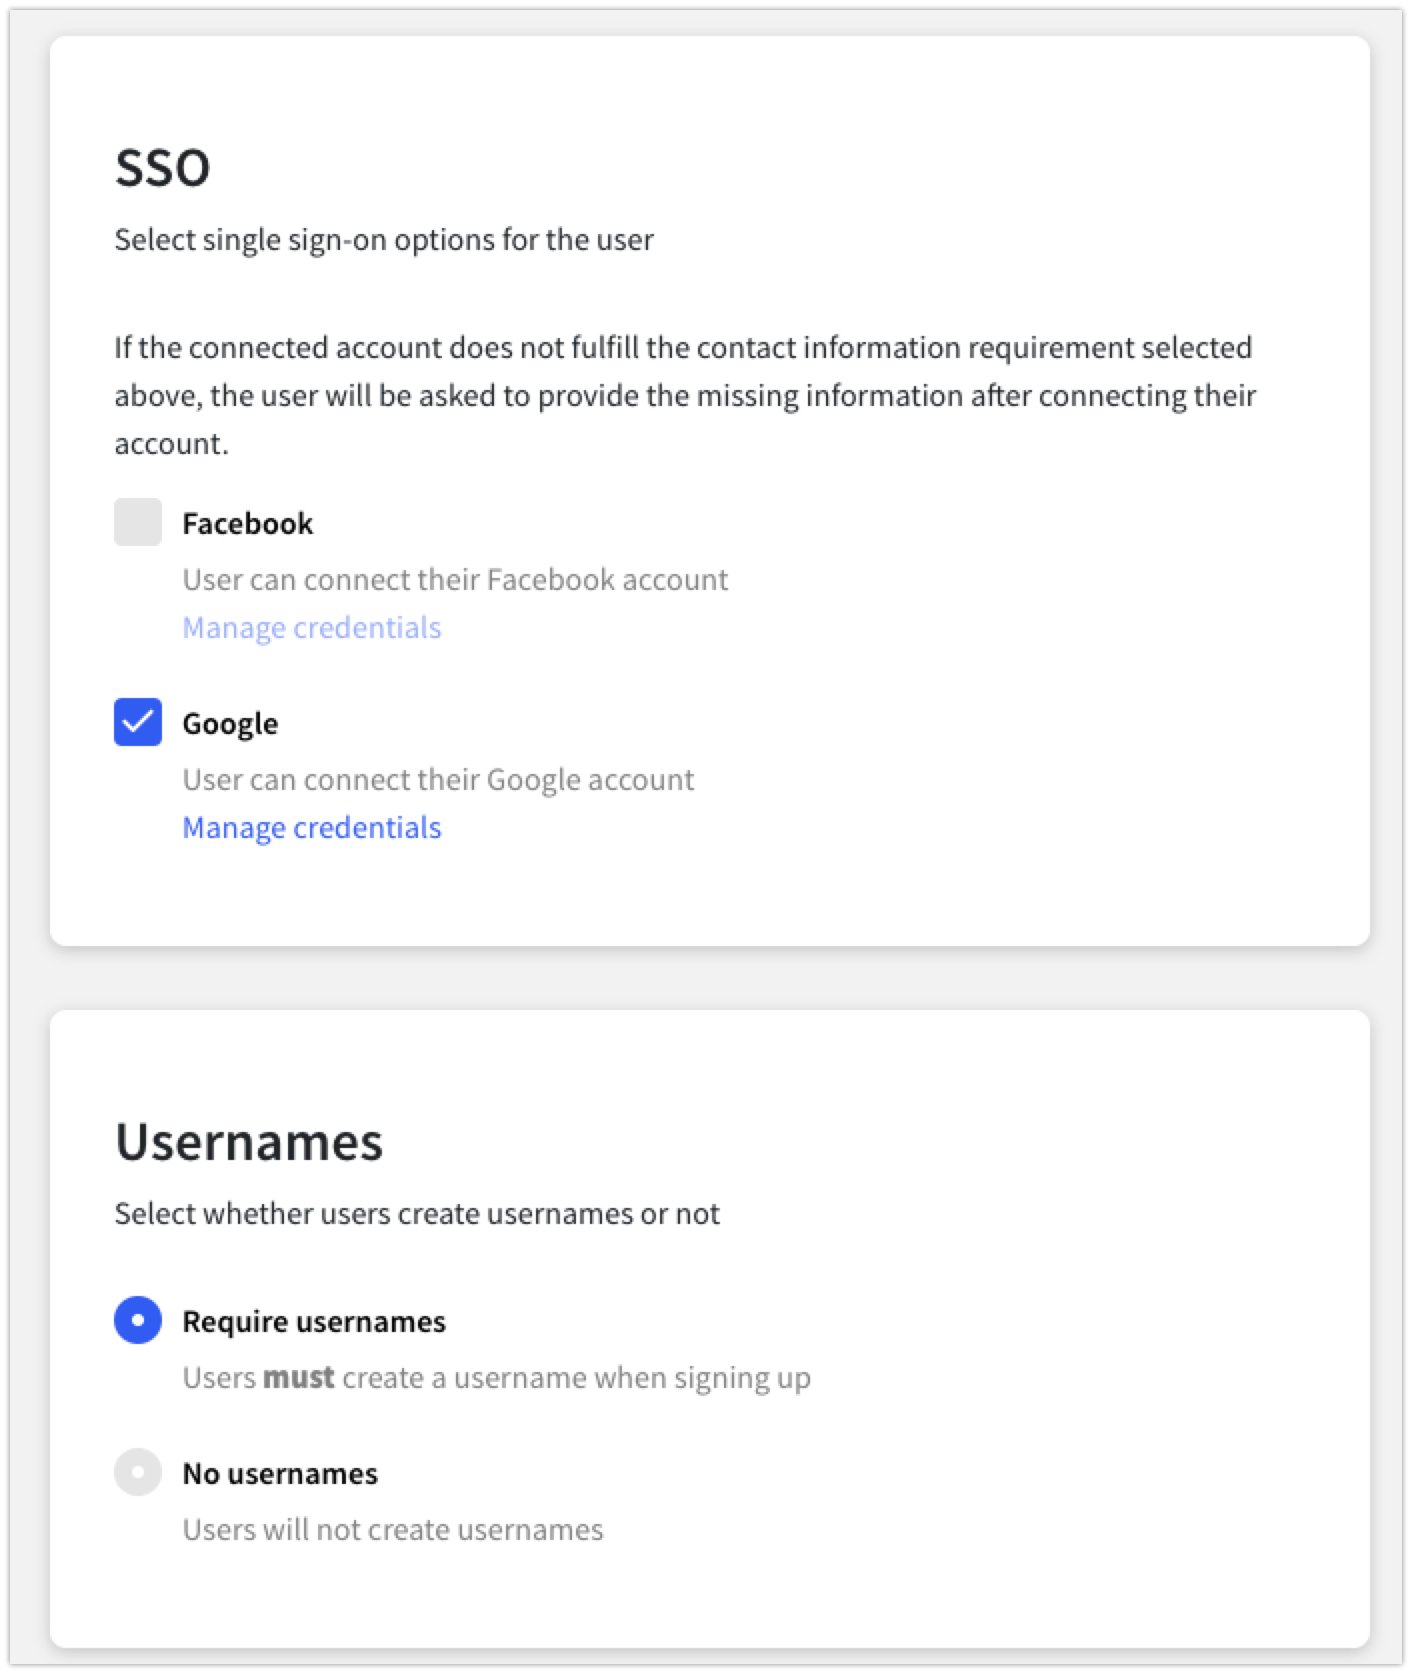
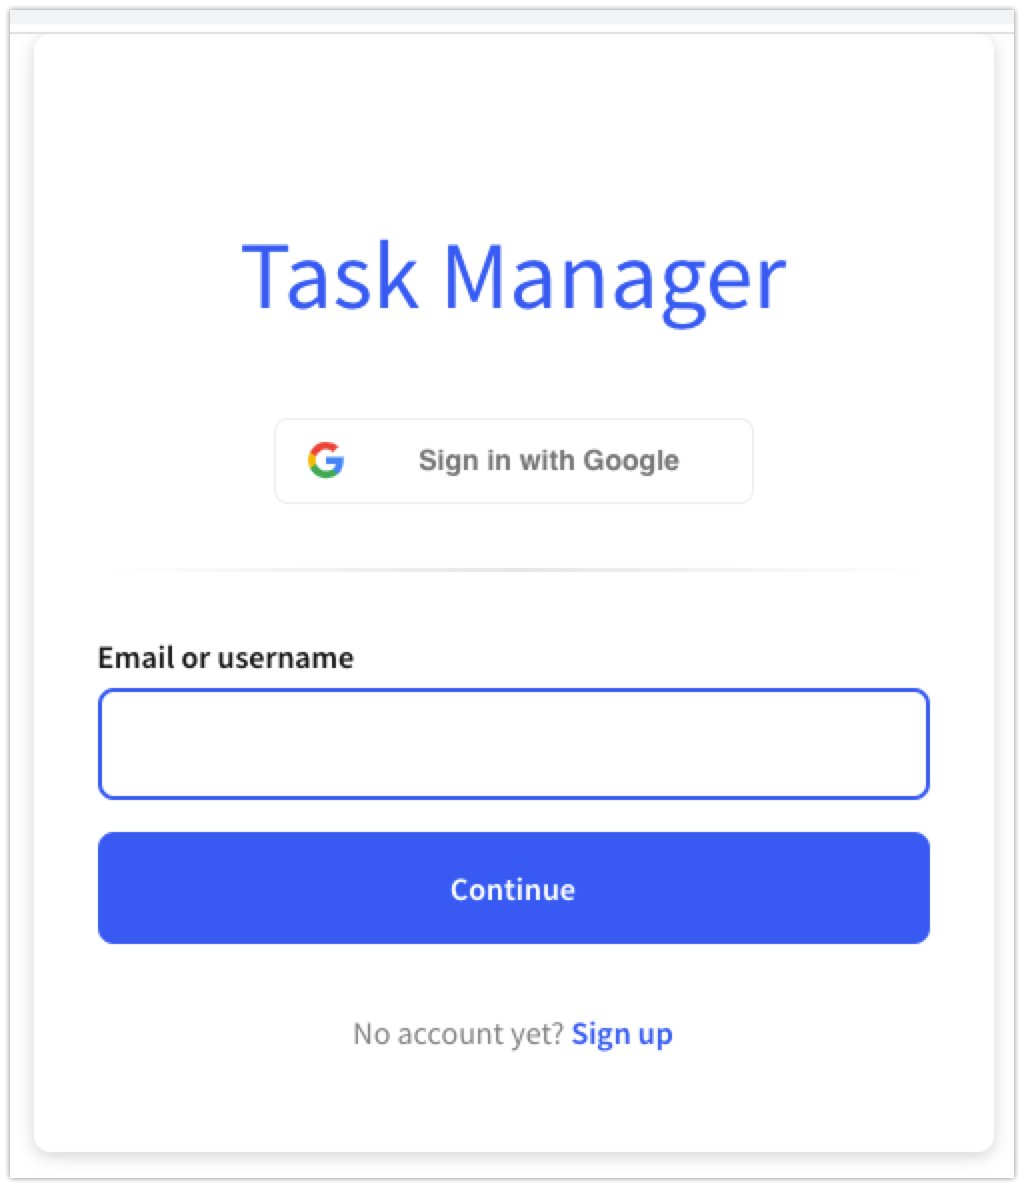
After a quick research ClerkDev was found, and by spending less that 30 min to get the create-react-app working with the following features (user auth, SSO using Google, multi-user session for testing, multiple environments among others) the desicion was made to use this tool.
You can see the code used for sign-in/sign-up and validate rendering the app once the user was logged in:
Make sure the username on clerk matches the user->name at Airtable, because that is used to query the data via the GraphQL endpoint. Having a way to sync data between Clerk and Airtable will be ideal and worth some research time.
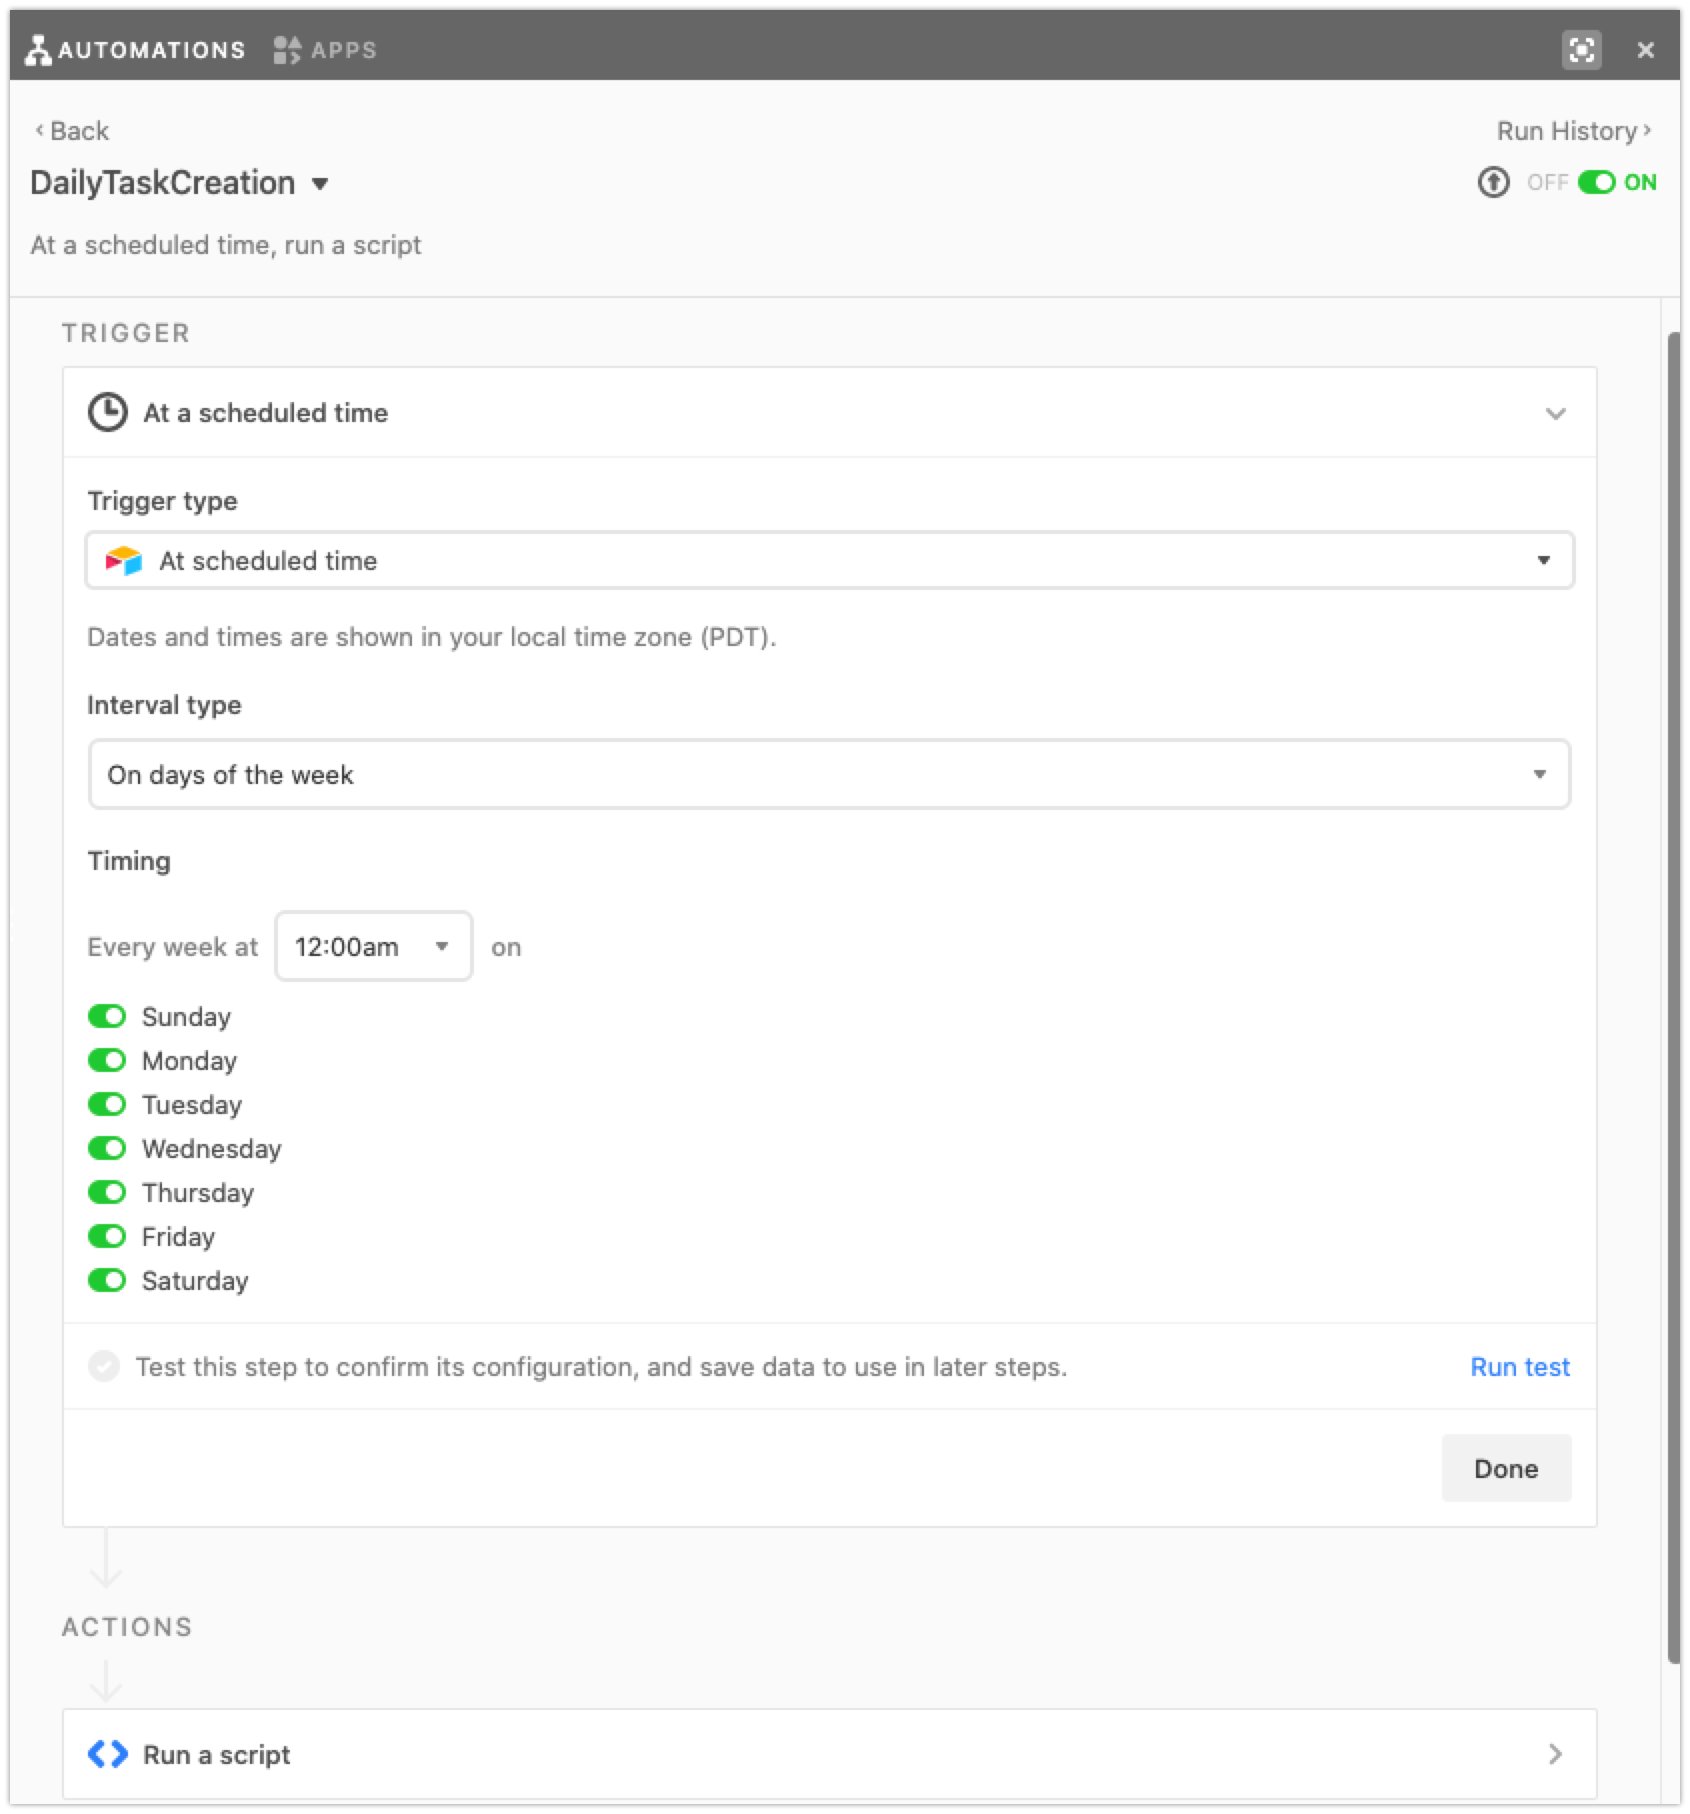
Adding an Airtable Script to Automate Daily Data Creation
After adding Clerk to take care of the user management, it seems the Users table is no longer needed, but is kept because it was used on a script to populate the UsersTasks records at midnite.
I am fully aware there are other many tools for each one of those needs, FaunaDB + FaunAdmin, Firebase + Firetable, 8Base, Supabase, Sanity, Prismic, ReactTable, MagicLink and many, many others (some of those tools we curently use or had used in the past at Octahedroid).
But I used the mentioned tools because are the best tools for the problem I was trying to resolve and provide an easy path and less friction to implement at this very moment.
Create a Clerk account and add a new application applying the settings mentioned on this post.
Copy paste the file .env.example as .env and update:
The REACT_APP_CLERK_FRONTEND_API value from your Clerk application.
The REACT_APP_GRAPHQL_URI value from your BaseQL application.
In order to install Airtable apps as BaseQL and take advantage of running scripts on automations you will need to have a paid plan.
Ready to embrace the JAMstack revolution?
Build fast and secure sites and apps delivered by pre-rendering files and serving them directly from a CDN, removing the requirement to manage or run web servers, databases and worry about traffic spikes.